
Archive for the ‘Recipes’ Category

Crispy Oven Baked Chicken Wings

Wednesday, April 5th, 2017

The original post for this recipe came from http://thecookful.com and was used at the 2017 March/April Birthday Bash in Cedar Valley.

Ingredients:

  • 10 whole chicken wings, cut into flats and drumettes (here’s how to do it). Discard tips or use for a stock. That leaves you with 20 wing pieces total
  • 1 Tbsp. aluminum-free baking powder (NOT baking soda)
  • 1/2 tsp. salt

Directions:

  1. Preheat oven to 250°F.
  2. Place a rack onto a cookie sheet.
  3. In a large bowl, toss the flats and drumettes with the baking powder and salt.
  4. Place wings on the rack in single layer and cook for 30 minutes.
  5. After 30 minutes, leave them in there and raise the heat to 425°F until brown and crispy, 40-50 minutes.
  6. Take wings out and let rest 5 minutes. Toss in a sauce of your choice (or choices)
 

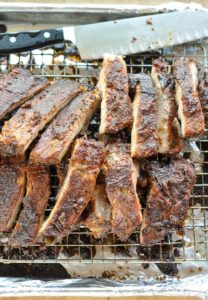
Great Ribs in the Oven

Wednesday, April 5th, 2017

The original for this recipe came from http://www.thekitchn.com.  We used it for the March/April 2017 birthday party in Cedar Valley.

Prepare the baking sheet: Line a baking sheet with aluminum foil and set a cooling rack on top. Lay the ribs on top of the rack in a single layer. This arrangement allows for heat circulations on all sides of the ribs.

Serves 6 to 8

What You Need

Ingredients

  • 4 to 5 pounds spare ribs or baby back ribs
  • 1/4 cup Dijon mustard
  • 2 teaspoons liquid smoke (optional)
  • 1 cup spice rub, like this one
  • 1 cup barbecue sauce

Instructions

  1. Prepare the baking sheet:
    • Line a baking sheet with aluminum foil and set a cooling rack on top. Lay the ribs on top of the rack in a single layer. This arrangement allows for heat circulations on all sides of the ribs.
  2. Season the ribs:
    • Mix the mustard and the liquid smoke, if using, and brush the ribs on both sides.
    • Sprinkle the ribs with the dry rub and pat gently to make sure the rub adheres to the rib meat.
    • Note: This step can be done the day ahead for a deeper flavor. Wrap the seasoned ribs in plastic wrap and refrigerate.
  3. Broil the ribs:
    • Heat the broiler and place an oven rack a few inches below the heating element. Make sure the meaty side of the ribs is facing up. Broil the ribs for about 5 minutes, until the sugar in the dry rub is bubbling and the ribs are evenly browned.
  4. Bake the ribs:
    • Set the oven to 300°F. Move the ribs to an oven rack in the middle of the oven. Roast for 2 1/2 to 3 hours for spare ribs or 1 1/2 to 2 hours for baby back ribs.
    • Halfway through cooking, cover the ribs with aluminum foil to protect them from drying out.
  5. Brush with barbecue sauce:
    • About 30 minutes before the end of cooking, brush the ribs with barbecue sauce, re-cover with foil, and finish cooking.
  6. Rest the ribs and serve:
    • The ribs are done when a knife slides easily into the thickest part of the rib meat. Let them rest, covered, for about 10 minutes, and then cut between the bones to separate the individual ribs. Serve immediately with extra barbecue sauce for dipping.


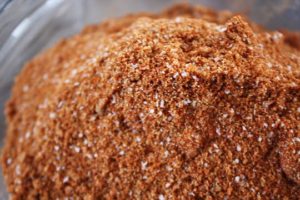
Dry Rub for Ribs etc

Wednesday, April 5th, 2017

This recipe originally was posted at http://www.thekitchn.com and was used as the dry rub for our oven cooked ribs at the March/April 2017 Birthday Party in Cedar Valley.  We actually did 1/2 of the recipe for our needs of 3 racks of ribs and still had leftover.

Ingredients (full recipe)

  • 2 cups brown sugar (see notes below)
  • 1/2 cup paprika
  • 1/4 cup + 2 tablespoons granulated garlic
  • 1/4 cup granulated onion
  • 1/4 cup kosher salt
  • 1/4 cup black pepper
  • 1/4 cup cumin
  • 1/8 cup ancho or chipotle (we didn’t have this)
  • 1/4 cup mustard powder
  • 1/8 cup cayenne pepper

Instructions

1. Gather Ingredients
Since there’s no oven or complicated procedure involved in the making of this rub, the assembly of everything is key. Forgetting one ingredient can make things taste a little off, so make sure everyone (spice wise rather) is in attendance!

2. Measure
Measure ingredients into prep bowls. We usually mix them into smaller bowls before adding them to the large bowl, just in case we measure incorrectly it’s easier to rectify.

3. Mix
Add all spices to your large bowl and add brown sugar. Combine with a whisk, or toss all ingredients into a large zip top bag and shake, shake, shake!

4. To Use
Rub your mixture into the piece of meat which you’ll be using. We suggest this rub on anything that once had legs. Don’t be afraid of it getting messy, that’s a given, just get it in all nooks and crannies including bony or fatty parts.

5. Wrap In Plastic
Wrap your meat in plastic for at least an hour, up to a day and let things mingle. Although you can grill, broil or bake things immediately, the longer the rub sits on the meat the more flavor will develop further into it. This can keep up to 72 hours if needs be, but is best right around the 24 hour mark! Enjoy!

Additional Notes:
There are as many dry rubs out there as there are hairs on your head. This is just a base mixture to get you started. If you like different things, feel free to adjust it to suit your tastes. You can also play around with the types of sugar in the mixture combining brown, white, turbinado and more!

Chocolate Mousse Cheesecake

Wednesday, December 21st, 2016

This Christmas, my wife had a group of ladies (and 1 man) over for dinner.  I have never seen so much food in all my life for 9 people!!!  One of the ladies brought a dessert that was to die for.  This is the recipe she was nice enough to send to us the next day.  You will *LOVE* it!!!

Chocolate mousse cheesecake

  • 1 pkg chocolate wafers
  • 1 cup chocolate wafer crumbs (buy separately or crush wafers, leaving out about 14 whole)
  • 1/3 cup melted butter or margarine
  • 12 oz. Cream cheese
  • 3 egg yolks beaten
  • 1/3 cup sugar
  • 1 ½ cups melted choclate chips
  • 3 egg whites
  • 1/3 cup sugar
  • 1 l tub Coolwhip
  1. Grease 10 inch springform pan well.
  2. Melt butter and mix with crumbs. Spread over bottom of pan.
  3. Place wafers standing around outside of edge (my pan uses 14 wafers), pressing them into the crumb base so they will hold.
  4. Bake at 350 degrees for 10 minutes.
  5. All to cool.
  6. Blend cream cheese, egg yolks, 1/3 cup sugar and melted chocolate chips.
  7. Separately, beat egg whites until foamy and add 1/3 cup sugar. Beat until glossy.
  8. Fold in cream cheese mixture by hand
  9. Fold in 1 cup Coolwhip and pour into prepared pan.
  10. Cover with remaining Coolwhip.
  11. Decorate with marachino cherries, chocolate crumbs or chocolate curls if desired.
    (this can be done before freezing or at time of serving)
  12. Cover with foil and freeze.
  13. Defrost 1 ½ to 2 hours before serving.
  14. Turn out of pan and serve on a pretty plate.

Serves 10-12

(I find I often can’t get it off the bottom of the springform pan and have to put it on the plate with the pan bottom still attached. Sometimes covering the bottom of the pan with foil at the beginning before baking and sliding it off on to the plate at serving time works!)

Enjoy!!!!!

I haven’t actually tested this recipe yet, but it tastes like it had about 12 POUNDS of cream cheese in it, not 12 ounces!!  Yummy!!!

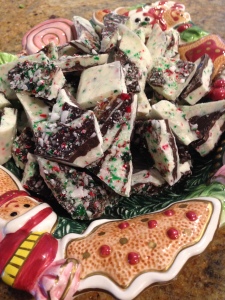
Snowy Mint Bark “Heaven in My Mouth”

Wednesday, December 17th, 2014

Snowy Mint Bark[I have to admit, this was not my original recipe, but over the years I’ve ‘perfected’ it and made it my own.]

Snowy Mint Bark is one of our family favourites around Christmas.  It’s so easy to sneak a little bit of this delectable chocolate and it’s a wonderful thing to add to the Christmas Cookie Plate that goes to the neighbours.  One family recently described it as “like heaven in my mouth” 🙂 (I’m not sure what that implies theologically, mind you.)  Besides that, it’s just plain easy!!!

Of course with a recipe this simple there’s room for lots of variation.

One warning, however… we did try using the green chocolate wafers one year to add some colour, but they didn’t melt properly.  Not sure why, but they never came out liquidy.  It was more like a PlayDough consistency :P.

We have added red and green food colouring to the white chocolate in the past, especially when making three different batches — white, red and green.  That worked well.  (Come to think of it, I forgot to do that this year!).

So here it is.  My version of Snowy Mint Bark.

Recipe for Snowy Mint Bark (Murray’s Version)

NOTE: Nothing about my recipes are exact.  These are guidelines only!

Ingredients:

  • 6 cups of white chocolate wafers melted (1kg)
  • 1 cup, or so, of dark chocolate wafers melted
  • 1 cup, or so, of crushed candy cane

Directions:

  • White Chocolate / Candy mixture:
    • Melt the white chocolate wafers in a large Pyrex measuring bowl, in the microwave on high for two minutes on high
    • Remove from microwave and stir
    • Melt for approximately another 2 minutes, but be careful not to burn the chocolate!
    • Remove from microwave and stir to eliminate the lumps
    • Add approximately 1/2 cup of crushed candy cane to the melted white chocolate
  • Melt 1 cup of the dark chocolate in a separate measuring cup in a similar method to the white chocolate above
  • Line a baking sheet with foil (preferably one with a small side to it)
  • Pour the dark and white chocolates on the foil in a marbleized pattern and swirl gently with a fork or spoon
  • Sprinkle the remaining crushed candy cane over the top
  • “Jiggle” the pan to allow the candy to settle in, and the chocolate to spread out more evenly
  • Allow to cool in a cool environment (cold room, garage, etc)
  • Break up into small pieces
  • Pig Out!

Quantities for Multiple Recipes and Easy Buying:

  1. Single Recipe: 6 cups white chocolate (1kg); 1 cup of dark chocolate wafers; 1 cup of crushed candy cane
  2. Double Recipe: 12 cups white chocolate (2kg); 2 cups of dark chocolate wafers; 2 cups of crushed candy cane
  3. Triple Recipe: 18 cups white chocolate (3kg); 3 cups of dark chocolate wafers; 3 cups of crushed candy cane

That’s it!!!

The original called for Andes mints and crushing your own candies.  Much more work and a lit messier (and also now harder to find), but here it is.  The original version of Snowy Mint Bark.

Recipe for Snowy Mint Bark (Original)

  • 6 cups of white chocolate melted (1kg)
  • 36 red and green mints crushed
  • one box of Andes Creme de Menthe wafer coarsely chopped (28 pieces)
  • pour first two onto a foil lined cookie sheet and sprinkle on the wafers
  • allow to cool
  • break up
  • pig out!

That’s it!!!

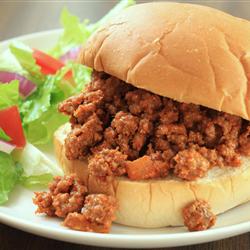
Murray’s Tasty Sloppy Joes

Friday, November 7th, 2014

Sloppy JoesLast night my wife was going to be late coming home from the city, but she had already planned to make Sloppy Joes to use up some Quick Sale hamburger buns she’d bought a few days earlier.

I wanted to surprise her with the meal all ready, but I had no idea how she’d done it before (I think it was with some kind of package of spice), so I went online and search for “Sloppy Joes”.

I found a recipe, but as usual, I don’t follow the instructions very well. 🙂 The result, however, was a hit!  So here goes…


Murray’s Tasty Sloppy Joes…

Original recipe said it makes 6 servings, but around our house it barely made for 3 – 4 servings

Ingredients:

  • 1 pound lean ground beef
  • 1/4 cup chopped red onion
  • 1/4 cup chopped red bell pepper
  • 3 cloves of garlic
  • 3 teaspoons prepared yellow mustard (roughly)
  • 3/4 cup ketchup
  • 3 heaping dessert spoons of brown sugar
  • some Club House Cajun Spice (I’m guessing at about 1 to 2 T)
  • some ground black pepper (a generous amount)
  • a few shakes of crushed chili peppers
  • 1 cup of water
  • 5 hamburger buns

Directions

  1. In a medium skillet over medium heat, brown the ground beef and drain off the fat.
  2. Stir in the remaining ingredients (except buns, obviously!); mix thoroughly.
  3. Reduce heat, and simmer for 30 minutes.
  4. Serve over hamburger buns
  5. Enjoy!!!

(Original recipe can be found here.)

Baked Chicken Enchiladas

Sunday, March 23rd, 2014

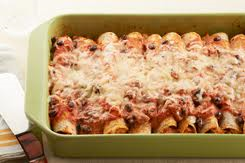
Well, since my blog site seems to get the most hits for my recipe for Kapow Shrimp, I figured I’d post this recipe that was originally from the Kraft Kitchen’s website, but we modified based on information that had been posted in the comments section.  The reaction when we whipped this up was “You can make this every night Mom!”  So…. here it is….

Baked Chicken Enchiladas

Ingredients

  • 1/3 Cup of Philadelphia Cream Cheese Spread
  • 3-1/2 Cups of Salsa (we used Medium)
  • 1/2 of a 14oz can of black beans, rinsed (aka 7oz)
  • 2-1/2 cups of chopped, cooked chicken (add some TexMex seasoning, if desired)
  • 1-1/3 cups (or more) shredded cheese – marble, or pre-shredded, bagged cheese
  • 10 small tortillas

Make It

  1. Heat oven to 375F
  2. Microwave cream cheese spread in medium microwavable bowl (we used a 4 cup Pyrex measuring cup) on MEDIUM for 30 seconds, or just until warmed.  Add 1/2 cup of Salsa.  MIx until well blended.  Stir in the remaining Salsa and beans.
  3. Combine chicken, 3/4 cup of the mixture above and 1/3 cup of shredded cheese.
  4. Spoon 1/3 cup chicken mixture down the centre of each tortilla.  Roll up and place, seam-side down, in a 13″ x 9″ baking dish sprayed with cooking spray.
  5. Top the tortillas with remaining bean mixture and shredded cheese.
  6. Bake 25 – 35 minutes or until enchiladas and heated through and cheese is melted.

That’s it.  Enjoy!!!

TTFN


“Red Lobster-like” Garlic Cheese Biscuits

Wednesday, January 8th, 2014

Red Lobster is one of our family’s favourite restaraunts.  We just love the unlimited buscuits they serve.  These “Cheese Garlic Biscuits” are very similar, if not the same as those served at Red Lobster.  The original recipe came off Facebook from Jenn Abadie Scioneaux but I’ve modified it just slightly 🙂

Ingredients (recipe makes 1 dozen)

  • 1 3/4 cups all-purpose flour
  • 1/2 teaspoon salt
  • 1/2 teaspoon baking powder
  • 5 tablespoons butter
  • 1 cup milk
  • 1 cup shredded Cheddar cheese

For the Topping:

  • 2 tablespoons unsalted butter, melted, divided
  • 1/2 teaspoon garlic powder
  • 1 teaspoon minced fresh parsley (or 1/4 teaspoon dried)

Directions:

  • Preheat oven to 450 degrees F (230 degrees C).
  • In a large bowl, sift together flour, salt and baking powder.
  • Cut in butter until mixture resembles coarse crumbs.
  • Make a well in the centre of flour mixture.
  • Add the milk and cheddar cheese; stir to combine.
  • Spoon the batter onto an ungreased baking sheet.
  • Bake in preheated oven for 12 to 15 minutes, until lightly browned.
  • While baking the biscuits, get the topping ready.
  • Mix together melted butter, garlic powder and parsley.
  • Remove the biscuits from the oven and immediately brush with the topping mixture.
  • Allow to cool for at least 5 minutes before serving.

Homemade Tortillas

Friday, September 7th, 2012

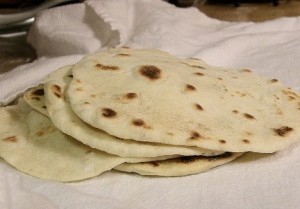
The following recipe is for flour tortillas that we make at home.  We played with a couple of online recipes to come up with one that we liked that used both white flour and corn flour.

  • White Flour – 4 1/4 Cups
  • Corn Flour – 2 Cups
  • Salt – 2 teaspoons
  • Vegetable Oil – 2/3 Cup
  • Water – 2 1/2 Cups

Makes 25 tortillas on our tortilla press that the kids gave us for Christmas.

Kapow Shrimp V1.0

Monday, June 18th, 2012

So for Father’s Day my one son and his girlfriend decided they were going to make “Kapow Shrimp” for me.  Now when you usually try to replicate restaurant recipes they never turn out the way the restaurant makes them (I’m still trying to make the Lin Garden Green Beans!!), however, they managed to find a recipe online from someone who works (or worked) at Montana’s, where they’ve had the Kapow Shrimp Burger on numerous occasions.

So, needless to say they made it up and served just the shrimp with some linguine pasta.  It was great!!! so we decided that we’d “save” the recipe and work on variations over time to come up with our own “Lahn Version” of the Kapow Sauce (I’m sure you could use it on chicken or other meats as well).

Kapow Shrimp

  • 1/4 cup garlic caesar dressing
  • 1 cup of Thai chili sauce
  • 1 tsp of lime juice
  • 1 tsp of cilantro
  • shrimp

Fry up shrimp and after they cool enough to touch, dip in the kapow sauce.

For variations we’re thinking of:

  • extra spices / hot sauce
  • use it on chicken
  • use the sauce as part of a wrap or tortilla.

We’ll see what additional recipes we can come up with.

Thanks for checking out this recipe!  If you really like it, why not do me a favour and consider sponsoring a child through Compassion Canada or Compassion International.  Thanks.

TTFN